So, you’re the proud owner of a new set of Secret Weapon “Tech Factory” bases. Now the question is what to do with them? Hopefully I can use this guide to help you out.
Recently I acquired a set of 10, 25mm Tech Factory bases from the guys over at Secret Weapon. They are great bases, and I was eager to get into painting them. Here’s a step-by-step of what I did.
Preparation
So, first off, your bases will come in a nice little zip-loc bag package (which is great, because they can be used to store other bits when you’re done with the bases.

Look awesome, don’t they?
Here are the tools I used with these:
· 30mm cork to mount them on

· Hobby Drill to put holes on the bottom, for mounting

· Straight Pins to attach the bases to the cork

· Pliers with wire-snips to remove the heads of the pins, and to later remove the pins from the bases

· A sharp hobby knife (or fine head snips) for removing the flash

· A fine file for removing tricky bits of flash

(As this is resin, remember to wear a mask when filing – the dust is toxic!)
· Whatever paints you favor. I use a mix of Vallejo, Games Workshop and commercial artist acrylics.
· Finally, some “Realistic Water” (available in many forms from different suppliers) and additional ink for making the oil/grease spills

In a pinch, some watered down PVA (“White”) glue will work for water.
I also like to use Liquitex Liquid Acrylics for wide area washes and mixing.
Now you’ve got all your tools ready, and you’ve opened the package. You are faced with this:

Don’t worry! It’s easy to fix!
· Use your snips and/or hobby knife to remove the largest bits of flash. (Warning: don’t get carried away with this, or you’ll end up removing bits of the bottom of the base, as I did.)
· After removing the largest bits of flash, use the file to remove any other imperfections on the base. (Unfortunately, this is the “nature of the beast” with our hobby – any mold process will produce flash.)
· When you’re happy with how your bases look, wash them in cool water with a mild soap. I use a very watered down dish soap for this – it will remove any remaining mold oils.
(Especially with the bases that have mesh flooring, let the bases air dry. Rubbing them with a cloth can cause parts to separate from the base – resin is a tricky item.)
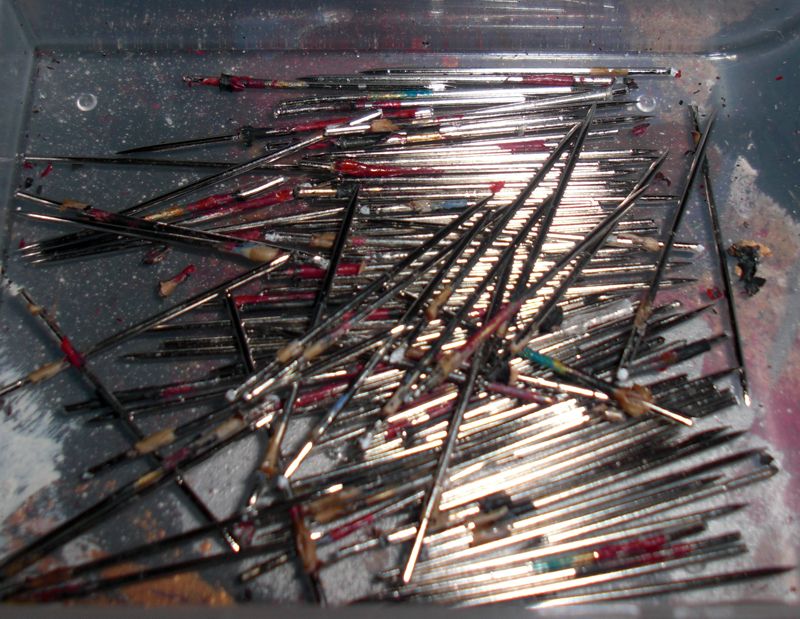
· When your bases are dry, flip them over and drill two small holes, for the pins, in the bottom of each one. I suggest two holes, as the bases tend to spin around while painting when you only use one pin.
· Use whatever super glue you like best to glue two pins into the holes on each base, and let the glue cure.
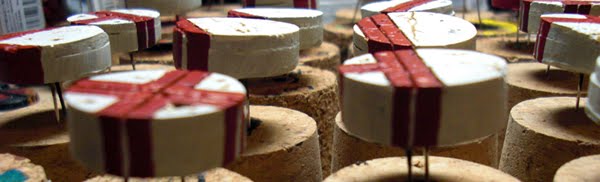
· After the glue has dried, mount the bases on a 30mm cork (any smaller and you risk the cork falling over and chipping your paint).

And there they are, cleaned, mounted and ready for you to work on.
One final bit of preparation I do is to add a very light coat of primer to the bases (I tend to use Acryl Gouache Metal or Plastic primer). Again, since resin is close to industrial plastics, in some cases, it may “fight” the paint without first getting a primer.
Painting the bases
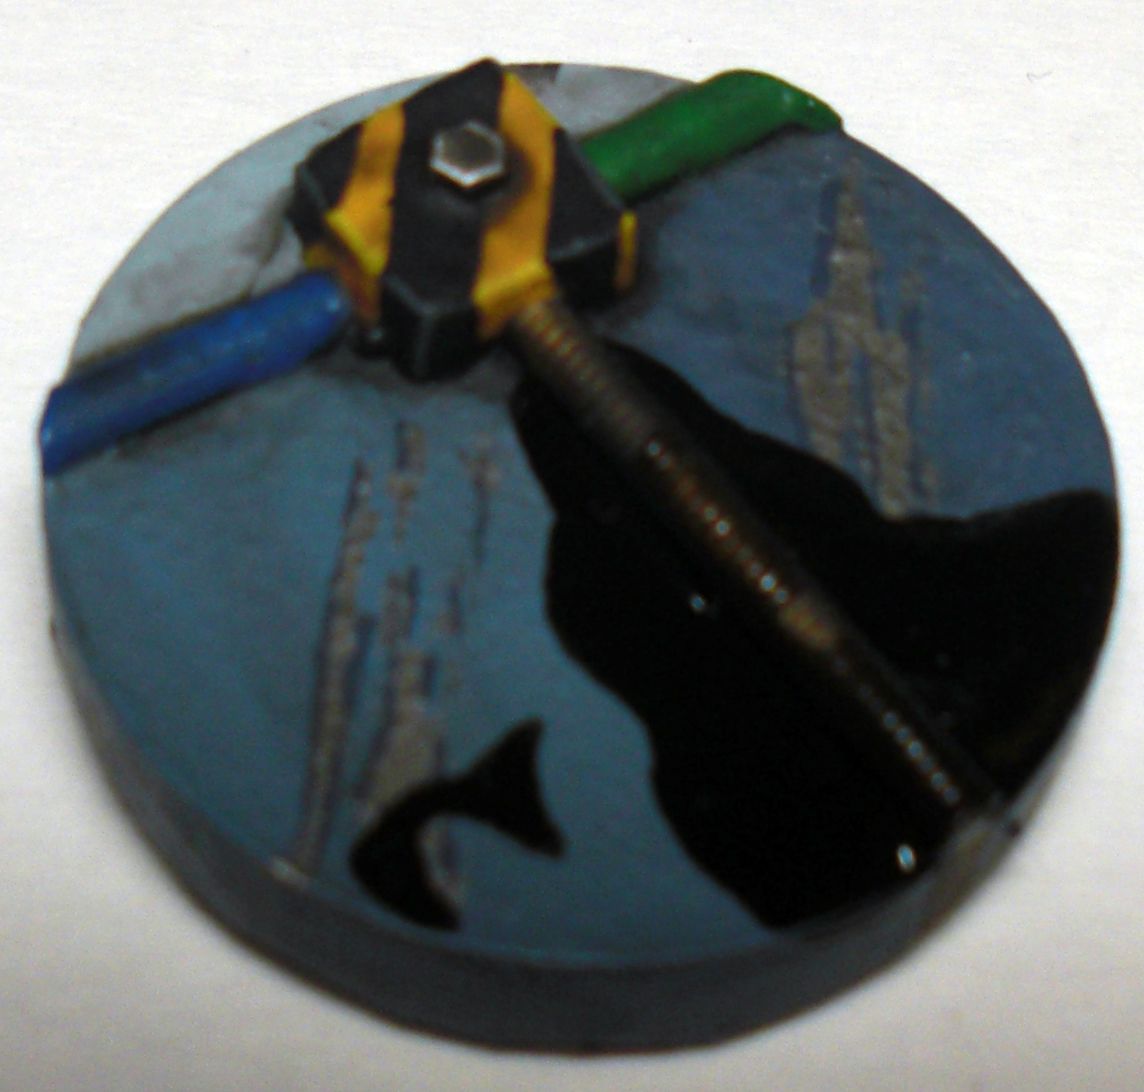
I started with a base-coat of Vallejo flat black, then added another coat of Chaos Black.

When this had dried, I gave them a coat of Vallejo Blue Grey (GW Shadow Grey could also work here).

When this was dry, I gave them their first wash of Badab Black and let it dry.
When the wash was dry, I started adding the other base colors.


· Grated metal got an undercoat of Tin Bitz. I then alternated shades for the floor panels. Some panels were painted Golden Yellow. Others got a coat of Wolf Grey or Fenris Grey. The stamped metal got coated with Sombre Grey.
When this coat had dried, I added more details.
· The ribbed cables were painted with either Old Brass or Chainmail.
The yellow plates were given black stripes to make the “warning” strips.
The stamped metal was given highlights of Fortress Grey in one direction and Wolf Grey in the other.
Any other “protruding” bits were given a suitable metal color. I mostly stuck with bronzes and silvers.

When these coats had dried, a final highlight was given to areas that needed it.
· The mesh flooring was given a dry-brush of Boltgun Metal.
The “blocks” on some of the bases (see above, bottom right base, between the stampes metal
and the mesh flooring) were also painted boltgun metal.
Guide rails were painted either Mithril Silver or Brass.

Two final things were done now.
· Non-ribbed cables were painted to be “regular” insulated wires. I used red, green and blue for the plastic insulation.
Scratches were put onto the flooring.
When this was all dry, they were given a final, liberal wash of Badab Black.

Making the scratches:
To achieve the scratches I dipped a fine-detail brush into some Boltgun Metal. I then quickly stroked the base in random places – but the same direction. This gives a broken appearance to the paint and makes it look a bit more realistic as a scratch.
When the Boltgun Metal was dry, I went back in with thinned down Mordian Blue and lightly outlined any solid lines in the metal.

Oil Spills
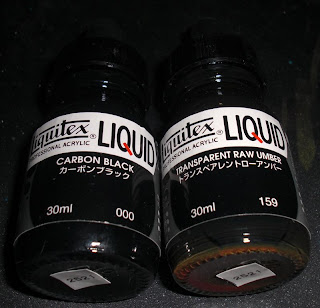
To make the oil spills, I mixed Carbon Black Ink with Transparent Raw Umber Ink with the Realistic Water.
I then used a pipette dropper to suck up some of the “oil” and dripped it on the bases from a height of a few centimeters. In a few places, I also placed the pipette directly on the base – this can give some interesting patterns.


Leave this to set – it takes a few hours to half a day (depending on how much you use) to completely cure.
The last thing I did was give the bottoms of the bases a coat of ‘Ard Coat, as this will prevent the paint from cracking and/or chipping and spreading to the actual base. I won’t seal the rest of the base until a model is attached to it and the whole thing is ready to be sealed.


One last bit, and this is just a personal preference. I like to “continue” my bases down to the bottom. For example, if there’s a chevron pattern on the top surface that goes to the edge, I like to continue that pattern down the side of the base.
And there you have it! I hope you have as much fun with these as I did!
Happy painting!!
Sons Of Prospero